If you’re anything like me, you love a good DIY, especially when it comes to natural beauty treatments. One of my absolute favorites is learning how to make rosemary oil for hair from dried rosemary. This oil has transformed my haircare routine—it’s my go-to for nourishing my scalp, combating dandruff, and even promoting healthier, fuller-looking hair. Plus, when you make it yourself, you know it’s 100% natural and fresh, without any additives.
I’m excited to walk you through the steps of making this wonderful rosemary oil yourself. It’s not complicated, and you’ll be amazed at the benefits you can get from just two simple ingredients. Here’s exactly how to make rosemary oil for hair from dried rosemary, step-by-step!
Why I Chose Rosemary Oil for Hair Health
Rosemary oil was a no-brainer for me when I first learned about its benefits for hair. Not only does it contain powerful antioxidants, but it’s also known for stimulating blood flow to the scalp. This is essential for promoting strong, healthy hair growth, especially if you’re dealing with thinning or dryness. Learning how to make rosemary oil for hair from dried rosemary has allowed me to enjoy all these benefits without breaking the bank.
Benefits of Making Rosemary Oil at Home
There’s a unique satisfaction in making rosemary oil at home. The process is straightforward, and you’re left with a pure, potent oil that you can trust. Plus, making it yourself ensures there are no added chemicals, which is particularly important for sensitive scalps or those looking to avoid artificial ingredients. Knowing how to make rosemary oil for hair from dried rosemary means you get a natural, chemical-free solution that you can customize based on your hair’s needs.
Explore: Scientific Studies on Rosemary Oil for Hair Growth
Why Dried Rosemary is the Best Choice
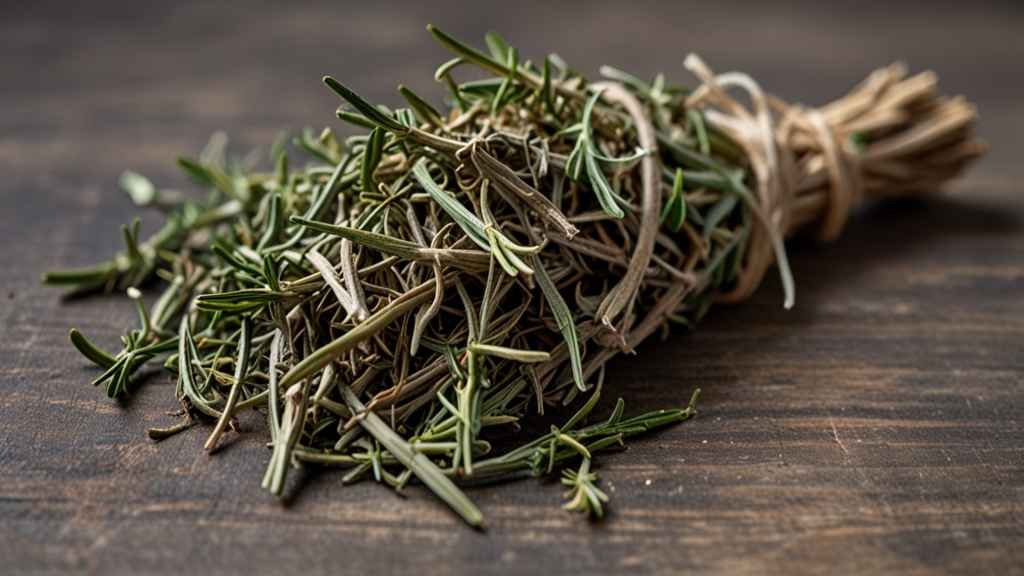
After some experimenting, I’ve found that dried rosemary works best. Fresh rosemary, while lovely, introduces moisture that can lead to faster spoilage. Dried rosemary infuses the oil effectively and delivers concentrated benefits to the scalp and hair. If you want a longer-lasting oil that maintains its potency, using dried rosemary for your rosemary oil is the way to go.
Explore:How to make rosemary oil from fresh rosemary?
What I Use to Make My Rosemary Oil
Here’s the simple list of ingredients and tools I gather before making my oil:
Step-by-Step Guide to Making Rosemary Oil
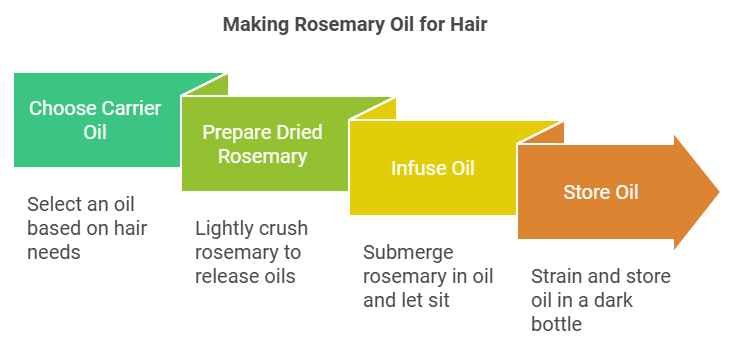
1. Choosing the Perfect Carrier Oil
A key part of how to make rosemary oil for hair from dried rosemary is picking the right carrier oil. Each carrier oil has different benefits:
- Olive Oil: Fantastic for hydration and works well with most hair types.
- Coconut Oil: Perfect if your hair needs extra moisture or is prone to frizz.
- Jojoba Oil: Light and non-greasy, ideal if you have oily or fine hair.
For my hair type, I tend to rotate between coconut and jojoba oil, depending on what my hair needs at the time.
Explore: How to Make Rosemary Oil for Hair with Olive Oil ?

2. Preparing the Dried Rosemary
Before starting the infusion, I lightly crush the dried rosemary in my hands. This helps release its natural oils, ensuring that the infusion is as strong and effective as possible. You don’t need to grind it to a powder—just a light crush will do.
3. Infusing the Oil
Here’s where the magic happens:
- Place the dried rosemary in a clean glass jar.
- Pour the carrier oil over the rosemary until it’s fully submerged.
- Seal the jar tightly, and let it sit in a warm, sunny spot for 2-4 weeks. I give it a gentle shake every few days to encourage the infusion process.
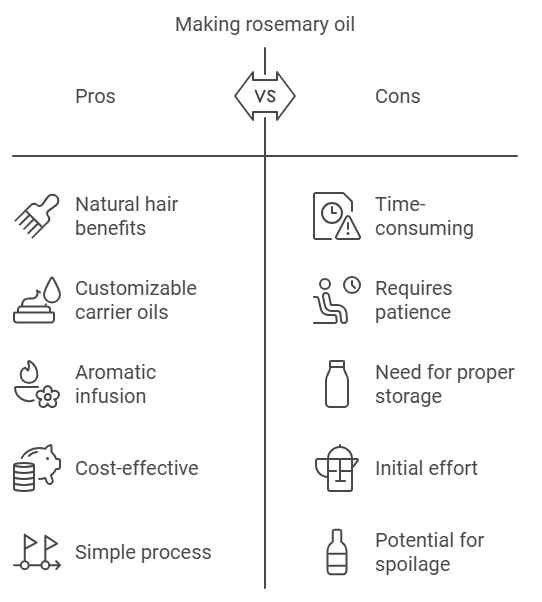
It does take a bit of patience, but the end result is a beautifully aromatic oil. This method has taught me that knowing how to make rosemary oil for hair from dried rosemary can be as easy as waiting a few weeks!
4. Storing the Oil Properly
Once the oil is infused to my liking, I strain it through a cheesecloth or fine strainer to remove the rosemary bits. Then, I transfer the oil to a dark glass bottle. This helps keep it fresh and potent by blocking out light.

How I Use Rosemary Oil on My Hair
Now that I’ve made my oil, there are several ways I like to use it.
Scalp Massage to Encourage Growth
I warm a little rosemary oil and massage it into my scalp. This not only feels amazing but also helps stimulate blood flow to the roots. I let it sit for about 30 minutes before rinsing it out with shampoo. Regular use of this homemade oil has become a staple in my routine for healthy, shiny hair.
Adding It to My Shampoo or Conditioner
A quick trick I’ve found is adding a few drops of rosemary oil to my regular shampoo or conditioner. It’s an easy way to incorporate its benefits without needing extra time for treatment. Just remember to shake your shampoo bottle a bit to mix it up.
Using It as a Deep Conditioning Mask
For a deeper treatment, I blend my rosemary oil with coconut oil, applying it generously to my scalp and hair. I leave it on for at least an hour before washing it out. It’s a fantastic way to give my hair a little extra love.
Explore: How to Make Rosemary Oil for Hair Growth: A Complete Guide

Extra Tips for Best Results with Rosemary Oil
- Warming the oil slightly before application helps it absorb better.
- Mixing it with a few drops of other essential oils, like lavender or peppermint, enhances the experience and scent.
- Consistency is key! I find using it at least once a week brings the best results.
How Often I Use Rosemary Oil
I personally find that using rosemary oil 1-2 times a week is the sweet spot for my hair. This allows me to enjoy the full benefits of rosemary oil without overloading my scalp.
Precautions I Follow
Here are a few things to keep in mind:
- I always do a patch test before using any essential oil.
- Avoid using it on irritated skin or open wounds.
- If you’re pregnant, breastfeeding, or have sensitive skin, consult a professional before using.

Who Should Be Careful with Rosemary Oil
If you have very sensitive skin, consider diluting the rosemary oil even more than usual. Those with certain health conditions should check with a healthcare provider before adding rosemary oil to their routine.
Explore: The Environmental Impact of Essential Oils
Other Uses I’ve Found for Homemade Rosemary Oil
Making rosemary oil is versatile, and I’ve discovered uses beyond hair care:
- Aromatherapy: Its calming scent is wonderful for reducing stress.
- Skincare: It’s antibacterial, so I sometimes use it on acne-prone areas.
- Muscle Massage: Mixed with other oils, it works wonders on sore muscles.
Conclusion
Learning how to make rosemary oil for hair from dried rosemary has been a rewarding addition to my hair care routine. It’s simple, affordable, and delivers incredible benefits for my scalp and hair health. Not only do I love the results, but I also enjoy the process of creating something all-natural that I know is benefiting my body. Whether you’re looking to boost hair growth, reduce dandruff, or just add a little shine, this DIY rosemary oil is a fantastic solution.
FAQs
1. How long does homemade rosemary oil last?
Stored in a cool, dark place, this homemade rosemary oil typically lasts about 6 months.
2. Can I use fresh rosemary instead of dried?
Yes, but fresh rosemary can introduce moisture, which may cause the oil to spoil faster. Dried rosemary is the better choice for a longer-lasting oil.
3. Is it safe to leave rosemary oil on my hair overnight?
Yes, but you might want to cover your pillow with a towel to avoid any stains.
4. How can I tell if I’m allergic to rosemary oil?
A patch test is a good idea—apply a small amount to your wrist and wait 24 hours to check for any reactions.
5. Can rosemary oil really help with hair thinning?
Yes, it’s known to stimulate blood flow, which can strengthen hair follicles and support growth. It has been effective for me personally.

